A Practical AI Image Workflow for WordPress Sites That Care About Speed

Images are a core part of most WordPress websites, but they are also one of the easiest ways to make a page unnecessarily heavy.
A blog post may need a featured image, screenshots, product examples, or supporting graphics. An online store can require even more visual content. AI image tools make producing these assets faster, but that speed can introduce a different problem: teams generate more images, upload them without much preparation, and gradually increase page weight. Even a well-configured caching setup cannot fully compensate for assets that were oversized from the start.
Treating image creation and website performance as parts of the same publishing workflow avoids most of these issues before they reach the server.
Start With the Page, Not the Image
Before generating or editing anything, decide where the image will appear.
A full-width hero image has different requirements from a small illustration inside a blog post. A WooCommerce product banner may need a landscape composition, while a Pinterest-oriented graphic could require a portrait layout.
Choosing the intended dimensions early prevents a common WordPress mistake: creating a very large image and relying on the site to scale it down in the browser. When a theme displays an 800-pixel content column but the uploaded image is 3000 pixels wide, the browser still downloads the full file before resizing it. That extra data adds up quickly on pages with several images.
This is also where AI tools can save work. Instead of creating one oversized master file for every situation, you can produce an image closer to its intended aspect ratio from the beginning.
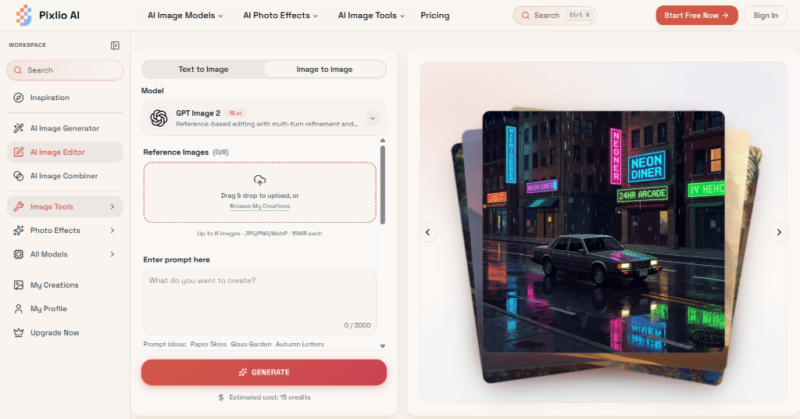
Pixlio, for example, lets users choose common ratios such as 1:1, 3:4, 4:3, 16:9, and several model-specific formats while creating images. Its AI image editor also supports both text-to-image and image-to-image workflows, so an existing visual can be revised rather than recreated manually whenever a WordPress layout changes.
Edit Before Uploading to WordPress
It is tempting to upload an image to the Media Library first and sort out the details later. That usually creates clutter, and clutter tends to stay.
A cleaner workflow is to finish the visual before it reaches WordPress.
Suppose a product photo needs a different background for a seasonal landing page. Instead of uploading the original, creating several intermediate versions, and storing all of them in the Media Library, edit the source externally and upload only the version you intend to publish.
AI editing is useful here because many changes can be described directly. A user might ask to replace a background, adjust the visual style, add an object, or create another variation based on the same source image.
For WordPress performance, what matters is that the final file reaches the site in an appropriate size and format, regardless of how it was produced.
Combine Assets Instead of Building Heavy Compositions in WordPress
Some visual layouts are assembled from several separate images, especially for product pages, campaign landing pages, and comparison content.
There are situations where separate HTML elements are the right choice. But if the goal is simply to display one fixed composition, loading multiple source images can add unnecessary weight to the page.
A single finished composite is sometimes the simpler option.
An image combiner can merge several source images into one coherent scene before the asset is uploaded. Pixlio includes guided modes such as Product in Scene, Subject into Background, Auto Combine, and Creative Blend. The tool adjusts elements such as placement, scale, lighting, shadows, and edges rather than simply stacking the uploaded pictures.

For a WordPress store, that could mean combining a plain product photograph with a lifestyle setting for a campaign graphic. A travel blog might combine a subject with a different background for a featured illustration. The resulting image becomes one normal media asset instead of a collection of separately positioned files.
This does not mean every group of images should be flattened into one graphic. Separate images are still better when they need independent links, responsive behavior, accessibility descriptions, or interaction. The point is to choose deliberately rather than adding extra assets by default.
Choose JPEG and PNG for the Right Reasons
File format still matters after the creative work is finished.
JPEG is generally the practical choice for photographic images where a smaller file is more important than preserving every pixel. PNG is useful when lossless output is needed, although its files can be considerably larger depending on the image content.
The AI editor provides both JPEG and PNG output options, making this decision part of the creation process rather than an afterthought.
WordPress site owners can take the optimization further by converting suitable uploads to WebP or AVIF through their existing image optimization setup. Many caching and optimization plugins handle this conversion automatically once the original is in the Media Library.
Whatever format you choose, avoid assuming that caching alone will solve an oversized image problem. A cached two-megabyte image is still a two-megabyte image that the visitor’s browser has to download. Caching reduces how often the server has to rebuild a page, but it does not shrink the assets on that page.
Keep a Simple Pre-Publishing Routine
A good image workflow does not need to become another complicated production system. A short checklist before publishing is usually enough:
- Check the image dimensions against the space where it will appear.
- Confirm that the file size is reasonable for web use.
- Make sure WordPress is serving responsive image variants correctly.
- Preview the page on both desktop and mobile.
For important pages, run a performance test after adding new media. If the page suddenly becomes heavier, inspect the largest assets first rather than changing several optimization settings at once.
This becomes especially relevant when AI tools make visual experimentation cheap. Creating five versions of a featured image is easy. Uploading all five to WordPress simply because they exist is usually unnecessary and adds weight that serves no visitor.
Better Visual Production Can Support a Faster Site
AI image tools can shorten the distance between an idea and a publishable graphic, but the final step still matters.
Generate for the intended layout, finish edits outside WordPress when practical, choose an appropriate format, compress the final asset, and upload only what the page actually needs.
That workflow keeps the creative advantages of AI without turning the Media Library into a collection of oversized drafts. Combined with a caching and image optimization setup, it gives WordPress publishers more room to use visual content while keeping page performance under control.