
Lead Generation on WordPress: Strategy and Setup

You can get thousands of people visiting your website every month and still end up with barely any new leads or customers. That happens when WordPress lead generation isn’t made a part of the experience from the very beginning. And it isn’t hard to build. It is just that most site owners skip the strategy and jump straight into installing plugins.
And that is exactly what we will fix here. We will give you 7 steps to create a lead-generation system from the ground up. You will also learn how to build a full technical setup for it.
What Is WordPress Lead Generation?
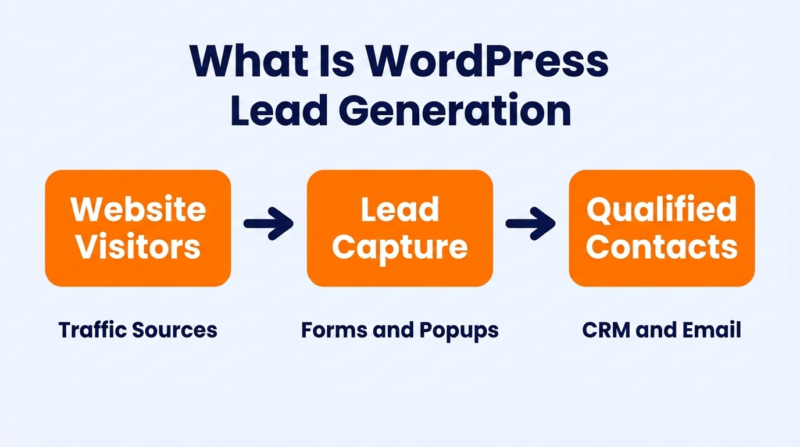
WordPress lead generation is the process of capturing visitor contact information – usually an email address – through your WordPress site. It happens through forms and popups. Landing pages and content upgrades work too. The goal is to convert visitors into identifiable contacts your sales or marketing team can follow up with.
It is not just installing a form plugin. A real system connects capture methods to email sequences and advanced analytics – so every lead gets the right follow-up at the right time.
How to Build Your WordPress Lead Generation Strategy: 7 Easy-to-Follow Steps

Strategy comes before lead generation tools. The companies that get the most leads from WordPress are the ones that decided what they wanted before they installed anything. These seven steps build that foundation.
1. Define Your Ideal Customer Profile (ICP)
The first thing to figure out is exactly who you are trying to bring in. An ICP isn’t a vague persona like “marketing managers aged 30–45.” It is a specific description of the company size and industry. It also includes the budget range and the problem that makes someone a good fit for what you sell.
- Write a one-paragraph ICP description that includes job title + company size + the specific problem your product solves.
- Pull your last 20 paying customers from your CRM and look for patterns in industry and company size. Your best leads will look like your best customers.
- Keep your ICP document somewhere your entire team can easily access and update. ShortPoint intranet design platform makes it easy to turn that information into a clean, organized page with sections for your ICP, qualified lead examples, disqualification criteria, and sales notes. Everyone works from the same version, which keeps marketing campaigns and sales conversations aligned.
2. Set Clear Lead Generation Goals and KPIs
Without specific numbers, lead generation efforts turn into “we should probably get more email signups.” That doesn’t give anyone anything to aim for. You have to set a monthly lead target and a cost-per-lead ceiling for paid campaigns.
- Set a monthly lead target based on your sales capacity. Aim for 200 leads at a 20% qualification rate if your team can handle 40 calls per month.
- Track conversion rate by page, not just sitewide. Your pricing page and your blog homepage will have very different benchmarks.
- Review KPIs every two weeks – not every quarter. A broken form can go unnoticed for weeks if nobody is checking.
3. Map the Customer Journey Before Creating Pages
A visitor who just discovered your brand needs different content than someone comparing two products. Every customer comes with a different goal. Planning their journey helps you treat them that way.
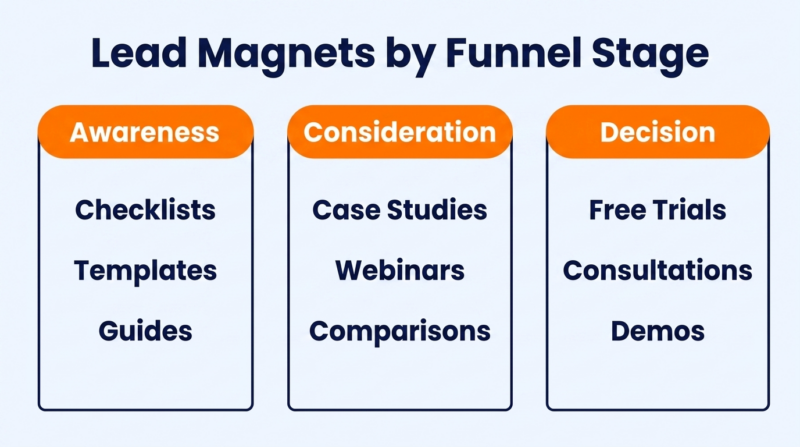
- Sketch a three-stage lead generation funnel on paper. Awareness (blog posts), consideration (comparison pages), decision (demo or free version trial pages). Assign one lead capture method to each.
- Tag every existing page on your WordPress site with its sales funnel stage. You will probably find that 80% of your content targets awareness and almost nothing targets decision.
- Build at least one dedicated high-converting landing page for the decision stage before adding more blog content. Most WordPress sites do a great job getting traffic but are light on conversion points.
4. Choose the Right Lead Magnets for Each Audience Segment
A PDF checklist works for a first-time visitor. A product demo works for someone who already understands the problem and is comparing solutions. Offering the same lead magnet to both groups means one of them will ignore it. Reducing form fields to 5 or fewer doubles conversion rates. But the lead magnet itself matters just as much as the form length.
- Create one lead magnet per funnel stage. A checklist or template for awareness visitors. A case study or ROI calculator for consideration visitors. A free consultation or trial for decision visitors.
- Test your lead magnet’s perceived value by asking 5 people outside your company: “Would you trade your email for this?” Rework the offer before building the form if the answer is lukewarm.
- Name the lead magnet with a specific outcome, not a format. “The 15-Minute Site Speed Audit Template” outperforms “Free PDF Download” every time.
5. Plan Content Around Search Intent and Buying Stages
Most WordPress sites publish blog posts and expect them to generate leads on their own. A lead-focused content plan matches each article to a specific keyword and a specific buying stage.
- Use Google Search Console to find queries your site already ranks for on page two. Write better content for those terms first – it is faster than targeting new keywords from scratch.
- Use a free YouTube video downloader to save competitor tutorial videos for content analysis. See which topics get the most views, then create written lead magnets with even more useful information.
- Assign every blog post a primary CTA before you start writing. If the post doesn’t have a clear next step for the reader, it is content marketing without the marketing.
6. Design Conversion Paths for Different Visitor Types
A homepage visitor and a blog reader arrived for different reasons. The homepage visitor might be evaluating your brand. The blog reader might be researching a topic with no purchase intent yet. Each one needs a different conversion path – a different sequence of pages and CTAs that moves them toward becoming a lead.
- Create at least two distinct conversion paths. One for direct traffic (homepage → features → demo) and one for organic blog traffic (blog post → lead magnet → email sequence).
- Add inline CTAs inside your blog content. Sidebar CTAs get less than 1% click-through on most WordPress sites because readers ignore them.
- Match every CTA to the subject of the page. A post about SEO should offer an SEO checklist or audit, while a pricing page should encourage visitors to book a consultation or request a demo instead of showing a generic newsletter signup.
7. Develop a Lead Qualification and Segmentation Framework
Not every lead is worth a sales call. Someone who downloaded a free checklist is less ready to buy than someone who requested a product demo. A qualification framework helps your team focus on leads that are most likely to convert – and keeps your email list organized by intent level.
- Score leads on a 1–10 scale based on two factors: fit (do they match your ICP?) and visitor behavior & engagement (how many pages did they visit, which contact forms did they fill out?).
- Set a minimum score threshold for sales follow-up. Leads below that threshold go into a nurture email sequence instead of getting a cold call.
- Tag every lead by the form and page that captured them. A lead from your pricing page is in a very different headspace than one from a blog post about industry trends.
How to Set Up a WordPress Lead Generation System From Scratch
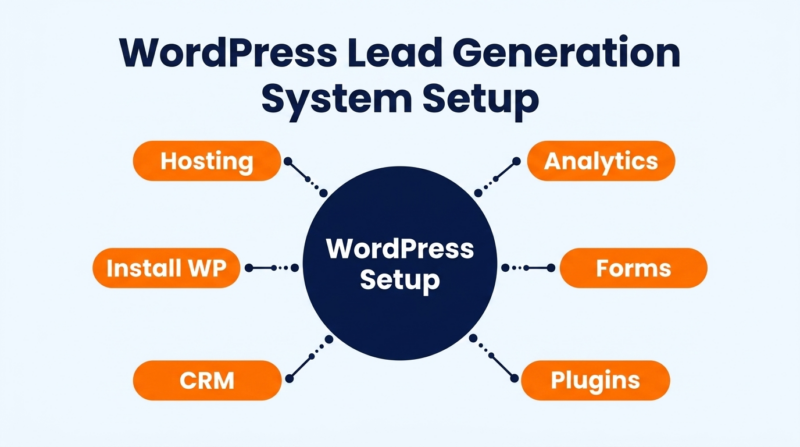
Strategy tells you what to build. This section tells you how to build it.
1. Choose a Reliable WordPress Hosting Provider
Your hosting provider is the first thing that affects whether your lead capture forms even load properly. Pages loading in 4 seconds convert at half the rate of pages loading in 1 second. If your hosting is slow, every form and popup on your site starts at a disadvantage. Landing pages load slowly too.
- Pick managed WordPress hosting over shared hosting. Managed plans handle caching server-level speed without you configuring anything.
- Test your current site speed on PageSpeed Insights. Hosting is the first issue to fix if your homepage loads in over 3 seconds.
- Make sure your host supports PHP 8.2+ and HTTP/2. Older PHP versions slow down form processing, and HTTP/2 loads page assets in parallel. Keeping your site fast also depends on strong Core Web Vitals performance.
2. Install WordPress and Configure Essential Site Settings
This step takes ten minutes if you are on managed hosting – most providers offer one-click WordPress installation. The configuration part matters more than the install. Default WordPress settings leave several things turned off or set incorrectly for lead generation.
- Set your permalink structure to “Post name” under Settings → Permalinks. This makes your lead capture page URLs clean and readable for both visitors and search engines.
- Install an SSL certificate and force HTTPS sitewide. Browsers flag non-HTTPS pages with a “Not Secure” warning, and nobody fills out a form on a page that is unsafe.
- Turn off comments on pages (leave them on for blog posts if you want). Lead capture pages shouldn’t have a comment section – it distracts from the form.
3. Select a WordPress Theme Built for High-Converting Pages
The theme controls your load speed and mobile experience. A theme that loads three unnecessary JavaScript libraries on every page will slow down your lead capture forms before anyone even sees them.
- Use GeneratePress or Astra. They are lightweight themes with built-in header and footer builders. They stay under 50KB of CSS on a clean install.
- Avoid multipurpose themes that bundle page builders and slider plugins into the theme itself. Each one adds JavaScript that runs on every page, including your lead forms.
- Test your theme’s mobile layout on an actual phone before launching any lead gen campaign. Over half of WordPress traffic comes from mobile, and a form that is hard to fill out on a phone won’t convert regardless of how good the offer is.
4. Install the Right Lead Generation Plugins
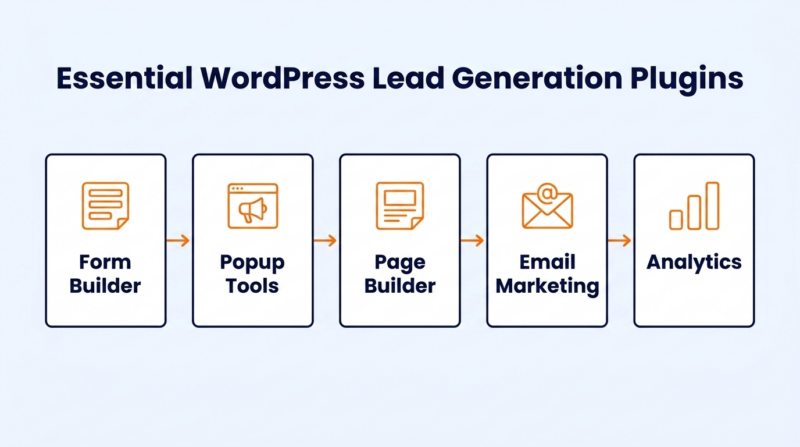
This is where most WordPress lead gen guides spend all their time – listing 15 plugins without explaining when to use each one. You don’t need 15. You need five, and each one serves a different function. Here’s what to install and why.
| Plugin Category | Best Lead Generation Plugins for the Job | What It Does |
| Form Builder Plugin | WPForms | Creates lead generation forms with conditional logic and multi-step layouts |
| Popup / Opt-in Form | OptinMonster | Shows targeted popups based on scroll depth and exit intent |
| Landing Page Builder | SeedProd | Builds standalone lead capture pages without touching your theme |
| Email Marketing | FluentCRM or Mailchimp | Sends automated email sequences to captured leads |
| Analytics | MonsterInsights | Tracks form submissions and conversion rates in Google Analytics |
– Download plugins from the official WordPress Plugin Repository
– Start with the core features first. Add advanced features only when your basic lead capture system is working well.
- Install WPForms and OptinMonster first. Those two cover forms and popups – the two capture methods that produce the most leads for most WordPress sites.
- Add SeedProd only if you are building dedicated landing pages. Its drag-and-drop builder makes it easy to create and test new page layouts. If your lead capture tools are on existing blog posts and your homepage, you don’t need a separate page builder yet.
- Keep total active plugins under 20. Each plugin adds database queries and JavaScript that slow page loads. A caching plugin like WP Fastest Cache offsets some of that overhead by serving static pages instead of processing PHP on every visit.
5. Connect Your CRM and Email Marketing Platform
Without a CRM connection, every form submission goes to your email inbox and stays there. Nobody follows up. Nobody segments. Nobody sends a welcome sequence. The lead goes cold. Connecting WordPress to a CRM turns a form submission into the start of a personal and meaningful conversation instead of a dead end.
- Use FluentCRM if you are starting out. It costs nothing for the free plan and handles email sequences without a third-party service. If you already rely on email marketing services like Mailchimp or ActiveCampaign, connect them directly to your forms from day one.
- If you are already using HubSpot or ActiveCampaign, install their WordPress plugin and map each form field to the matching CRM field. First name goes to first name. Email goes to email. Don’t skip field mapping, or your data will be messy from day one.
- Set up a test submission after every new form connection. Confirm the data arrives in the CRM correctly and verify the automated email fires. Broken integrations are invisible until someone checks. Pairing your CRM with the right marketing automation tools makes the entire follow-up process faster.
6. Set Up Lead Capture Forms Across Key Pages
Your homepage and top-performing blog posts should each have a lead capture form. The form type depends on the page. A homepage might use an embedded form in the hero section. A blog post works better with an inline form after the first major section. A pricing page should offer a demo request or consultation.
- Add an inline lead capture form after the first H2 section on every blog post that gets more than 100 monthly visits. Those are the posts already attracting the right traffic – they just need a capture point.
- Put an exit-intent popup on your pricing page for a free consultation or discount code. Visitors who leave a pricing page without converting are worth one more attempt.
- Create a sticky bar at the top of your site with a one-field email signup and a strong offer. Sticky bars get seen on every page without interrupting the reading experience. Test push notifications for visitors who decline your email offer. They give you another way to bring people back without asking for an email address right away.
7. Configure Analytics, Conversion Tracking, and Event Measurement
Without conversion tracking, you are assuming which pages generate leads and which ones just generate traffic. Set up your tracking from day one, and you will save yourself a lot of cleanup later.
- Install MonsterInsights and connect it to GA4. Enable form tracking under the Forms addon to automatically capture submission events without any code.
- Set up a GA4 conversion event for every form submission. This lets you see which traffic sources produce actual leads, not just page views.
- Add UTM parameters to every link in your email sequences and paid ads. Without UTMs, GA4 lumps all your website traffic into generic buckets, and you can’t tell which campaign is actually working. Keeping your analytics accurate also means keeping your site fast – clearing your WordPress cache regularly prevents stale pages from skewing your conversion data.
3 Real-World WordPress Lead Generation Case Studies Worth Studying
These three companies use WordPress as a lead generation engine in very different ways. Each one picked a different strategy and a different capture method.
1. Sewing Parts Online
Sewing Parts Online publishes all its educational content on a WordPress blog that sits alongside its product catalog. Their article “Beginner’s Guide To Embroidery (Episode 1): Choosing a Machine” ranks on page one for several long-tail embroidery machine queries.
At the 40% scroll point of that article, an inline form offers a free downloadable “Embroidery Machine Comparison Chart” PDF. The form asks for first name and email – two fields, nothing else. That single blog post generated over 1,200 email signups in 2025.
34% of those subscribers clicked through to a product page within the first three emails. The WordPress blog produces more qualified leads than the store’s own homepage because the content answers specific questions buyers have before they’re ready to purchase.
2. Nootropics Depot
Nootropics Depot’s Tongkat Ali guide is a good example of building lead generation around long-form research guides – articles covering specific supplement benefits. It pulls in readers who are deep in the research phase and not ready to buy yet.
At the 60% scroll mark, an inline opt-in box offers a free supplement stacking guide. No popup. Just a static form embedded in the content like a natural reading break. That placement is deliberate.
By the time someone has read 60% of the article about Tongkat Ali, they are invested enough to trade an email for more information. That single guide page generates over 800 email subscribers per month from organic search alone.
3. Brondell
Brondell sells bidets and bathroom hygiene products. Their WordPress site opens with a standard pop-up offering 10% off for email subscribers. Every eCommerce site does that. What sets Brondell apart is what happens after.
Their product quiz asks five questions. It covers bathroom size and budget range first. Then it asks about electrical outlet access, preferred water temperature, and seat style. On the final screen – before showing the recommended product – the quiz asks for an email address.
62% of quiz completers enter their email because they have already invested two minutes answering questions and want their personalized result. That quiz produces three times more email signups per visitor than the initial discount popup. The quiz also pre-qualifies leads – Brondell’s email team knows exactly which product to recommend in the follow-up sequence.
Conclusion
The best WordPress lead generation results are achieved when the strategy comes before the plugins. The sites that capture the most leads are the ones that defined their audience and mapped the lead generation journey before building anything. The technical side matters just as much. A slow site or a disconnected CRM can undo months of content work in seconds.
At WP Fastest Cache, we help WordPress websites load faster – and faster pages directly translate to higher conversion rates on every lead capture form. Our caching plugin serves over 1.5 million websites and handles HTML and CSS optimization. It also manages JavaScript deferral and built-in image compression.
Try WP Fastest Cache and see how much faster your lead gen pages could be.
